Did you know that Zimbra 8.7 (now available!) has two-factor authentication (2FA) available?
If you don’t know what 2FA is, it is an extra layer of security for your email account. With 2FA enabled, to log into your Zimbra account, you need your password and a code generated by your smartphone.
Enabling 2FA is easy, but there are a few steps. You will need access to your Zimbra account and your smartphone to complete the 2FA setup. First you will see a graphic, followed by the steps.
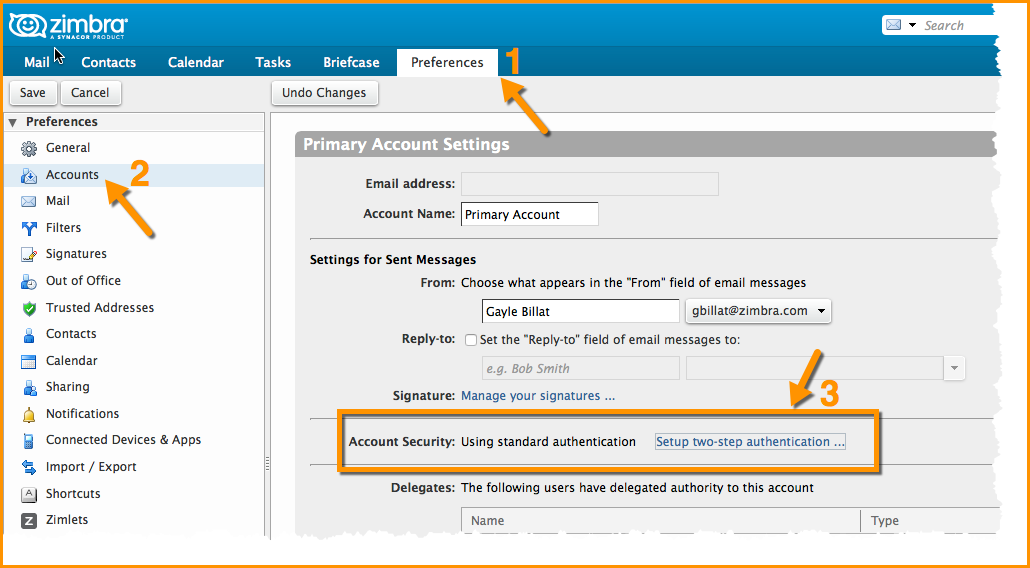
1. Click the Preferences tab.
2. Click Accounts.
3. Click Setup two-step authentication…
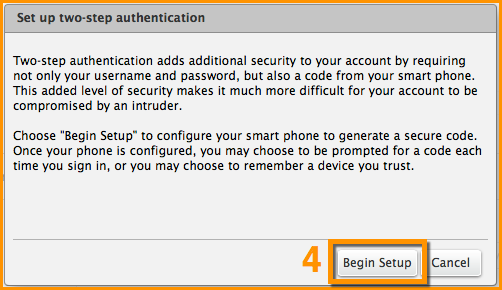
4. Click Begin Setup.
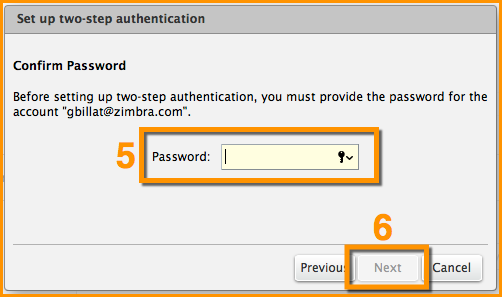
5. Enter your Zimbra password.
6. Click Next.
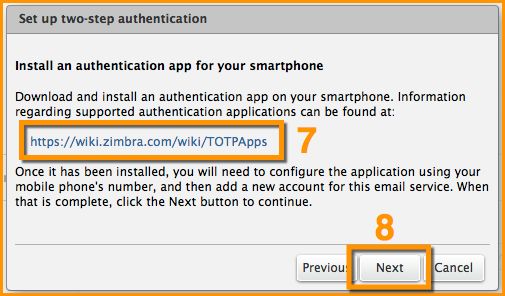
The next steps require your smartphone.
7. Click the URL to see which authentication applications are available for your smartphone.
– Download the authentication application and install it on your smartphone.
– Click Set up account in the application.
– Follow the steps to set up the account using a key.
8. Click Next.
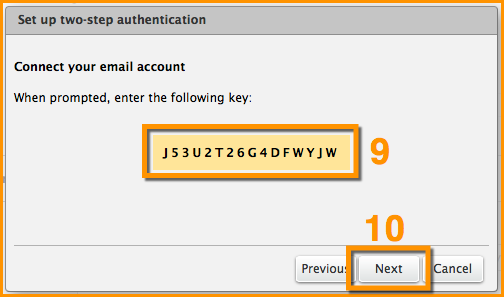
9. Using the app on your smartphone, enter your email address and the key provided in this step.
10. Click Next.
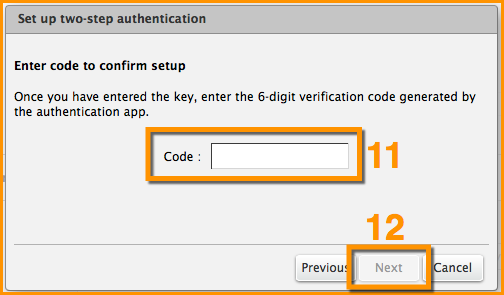
Your smartphone will provide a Code to complete the 2FA setup.
11. Enter the code provided on your smartphone.
12. Click Next.
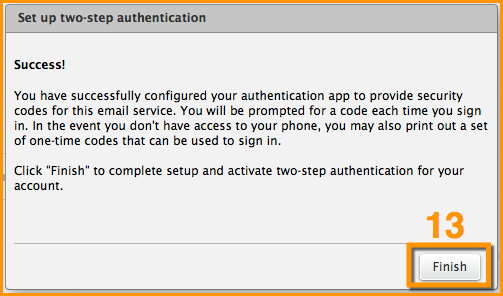
13. Success! You have enabled 2FA for your Zimbra account!
What now? Every time you log into your Zimbra account, you will be prompted for a new code from the application on your phone.
What if you don’t have your phone, or what if your phone runs out of batteries?
You have 10 one-time codes to use if you do not have your phone available. See the graphic below. Simply click the “View” link and print the 10 codes. Keep these codes handy, so they are available when you need them.


Comments are closed.