Did You Know? Using Filters Part 1: Creating a Filter
Did you know that you can create email filters in Zimbra? This is part 1 of a 4-part series, which includes Troubleshooting Filters.
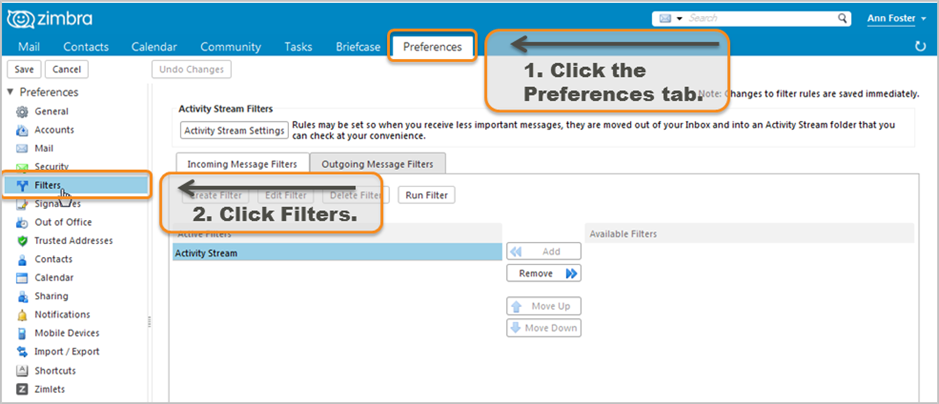
To create a filter:
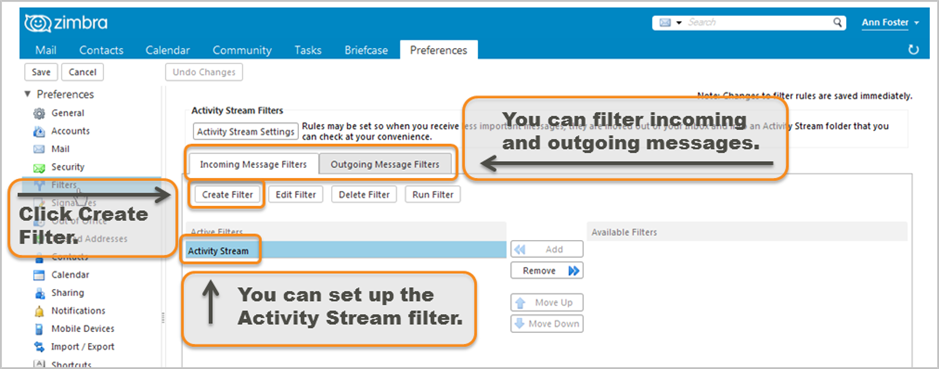
You can create filters to manage incoming and outgoing email messages, including Calendar invitations/responses.
You can also set up the Activity Stream filter to manage less important messages.
Next, click Create Filter.
A filter consists of one or more conditions and one or more actions. If the message matches the conditions, the specified actions are performed.
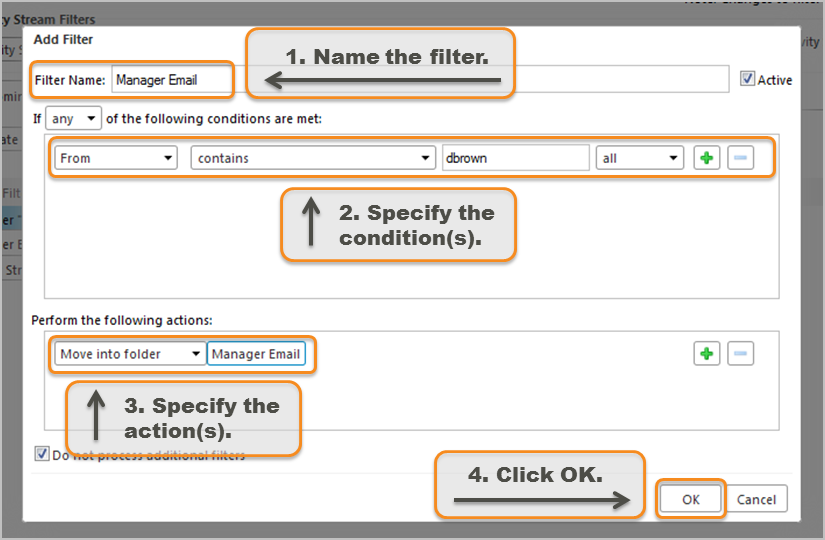
To continue creating a filter, in the Add Filter dialog box:
- Name the filter.
- Specify the condition(s).
- Specify the action(s).
- Click OK.
In this example, the Manager Email filter will move all email where From contains “dbrown” (condition) into the Manager Email folder (action).
For a list of all filter conditions and actions, click here.
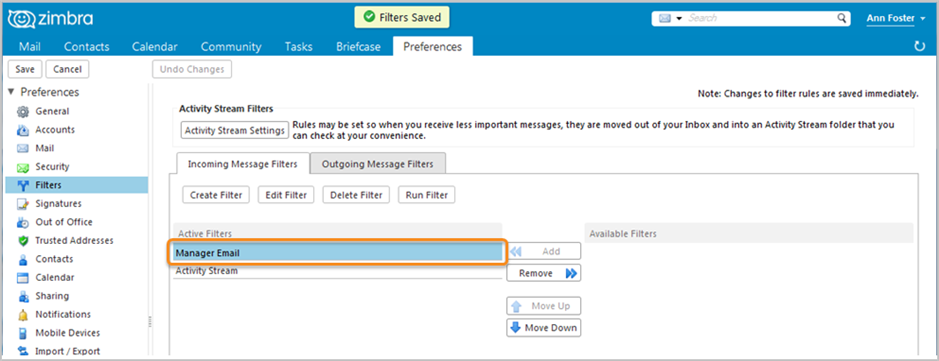
The Manager Email filter will now process all incoming email messages.
You can create filters to:
- Sort incoming messages into folders
- Tag messages
- Forward to another email address
- Flag messages for importance
- Mark messages as read or unread


Comments are closed.