
In today’s post, Barry de Graaff – Channel Evangelist at Synacor – is back! He explains how to write a Zimlet that allows a user to attach files from a third party service with the Zimbra Attacher Zimlet. This way users can attach files from any service you wish to integrate directly from Zimbra.
If you are new to Zimlets … Zimlets are used to:
- Integrate Zimbra Collaboration with third-party information systems and content.
- Extend the functionality of the Zimbra user interface (UI).
Quick link to the Zimlet Developer Guide.
Prerequisites for the Zimbra Attacher Zimlet
To follow the steps in this post, you need a Zimbra test server running Zimbra 9 Network Edition. You can set this up in a Virtual Machine in the cloud, or you can install it on your local computer inside VirtualBox/KVM/Parallels, etc. If you decide to set it up on your local computer, you need at least an i5 with 16GB of RAM and a SSD. Your test server needs to be accessible over SSH.
Here are instructions to set up your Zimbra server: https://blog.zimbra.com/ 2018/01/install-zimbra-collaboration-8-8-ubuntu-16-04-lts/
Be sure to install the latest patches. You can find instructions on how to install patches at https://wiki.zimbra.com/wiki/Zimbra_Releases
Deploy the Zimlet Sideloader
Deploy and enable the Zimlet Sideloader on your development server. You only have to do this step once.
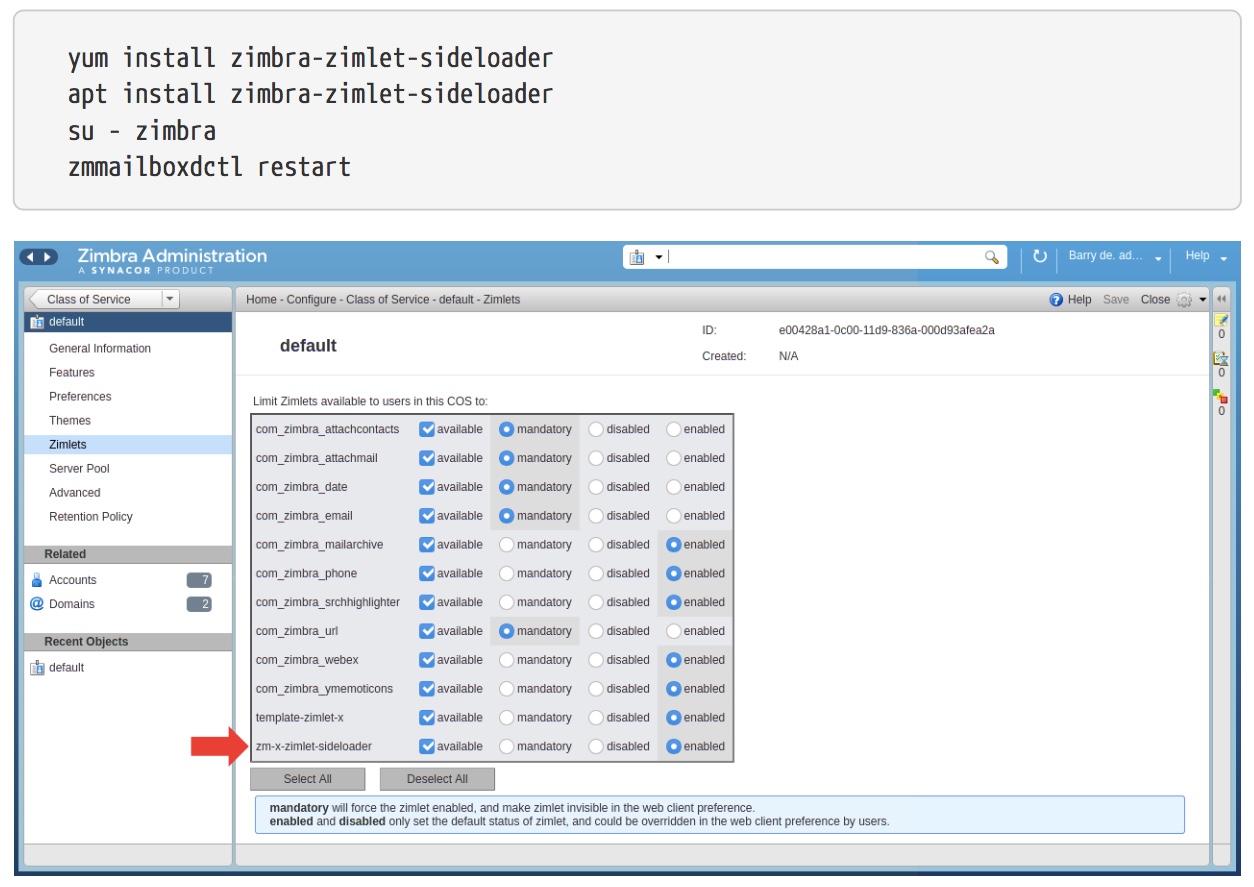
Verify that the Sideloader Zimlet is available and enabled for your Zimbra Class of Service (CoS) by logging into the Admin UI → Home → Configure → Class of Service, as shown above.
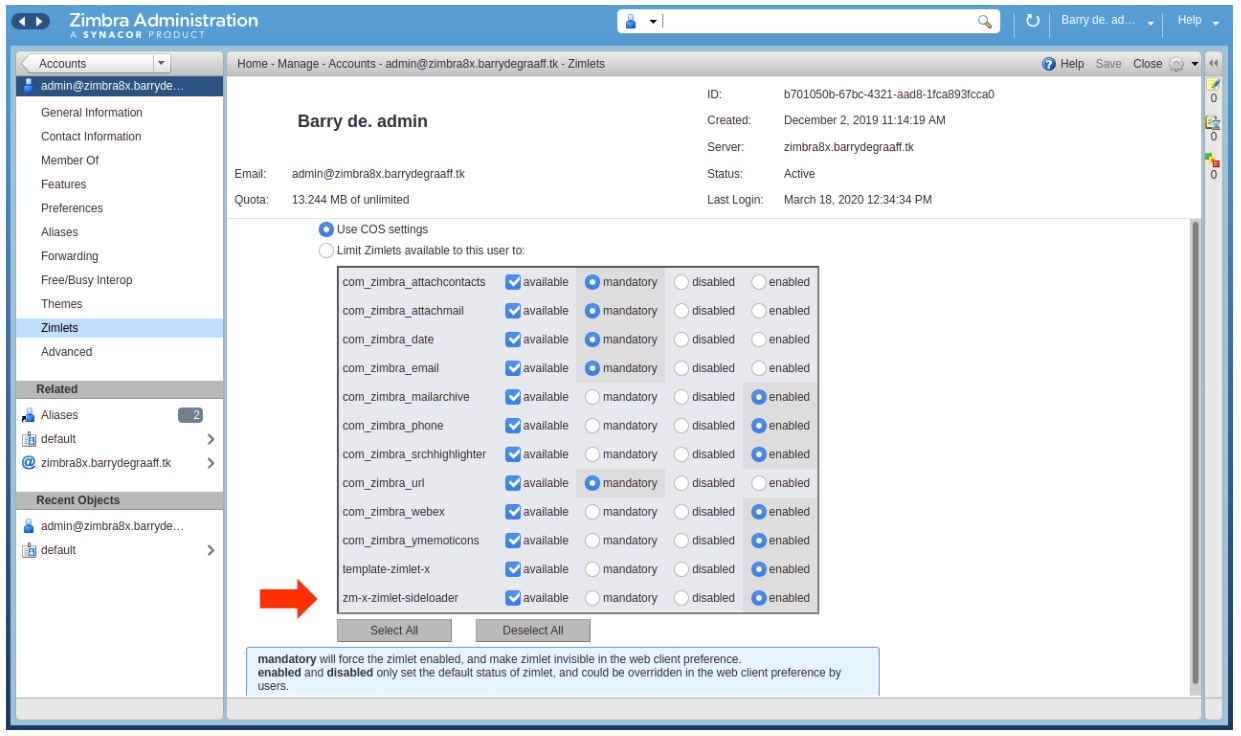
Verify that the Sideloader Zimlet is available and enabled for your Zimbra and account by logging into the Admin UI → Home → Manage → Accounts.
Installing Zimbra’s Zimlet CLI
You can develop Zimbra Zimlets on any OS supported by NodeJS (https://nodejs.org/en/download/). This article includes Linux commands you can run on CentOS/Fedora/Redhat and Ubuntu. If you run on a different OS, reading these commands should help you understand what you must do to get started.
Zimbra provides a tool called Zimlet CLI that is based on Webpack. It is used for building/packaging your Zimlet and for working with Zimlet templates. Install it on your local computer:
As root:

Download and Run the Zimbra Attacher Zimlet
Create a folder on your local computer to store the Attacher Zimlet:
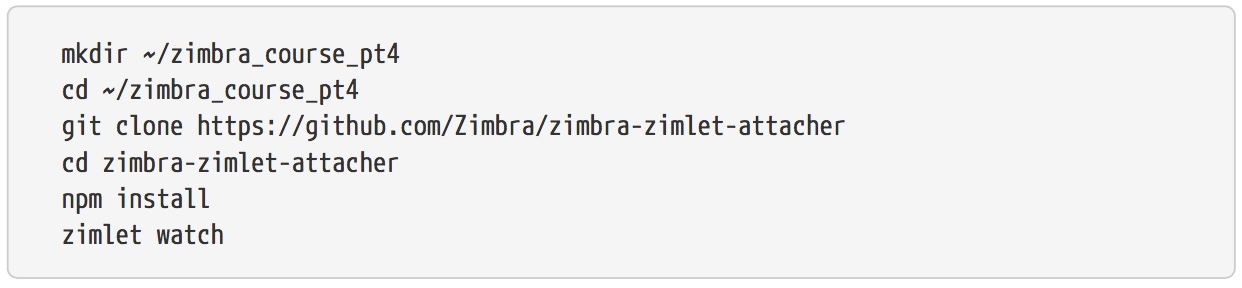
The output of this command should be:
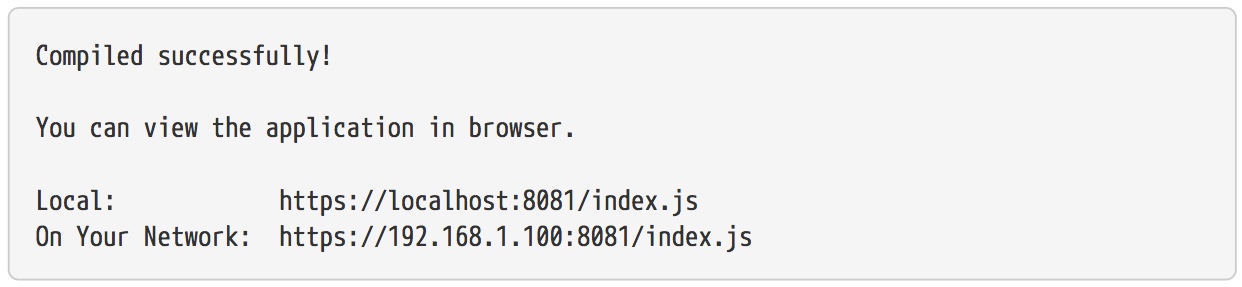
Visit https://localhost:8081/index.js in your browser and accept the self-signed certificate. The index.js is a packed version of the Attacher Zimlet. More information about the zimlet command, npm and using SSL certificates can be found in https://github.com/Zimbra/zm-zimlet-guide.
Sideload the Zimbra Attacher Zimlet
Log on to your Zimbra development server and make sure that you are seeing the modern UI. Then append /sdk/zimlets to the URL.
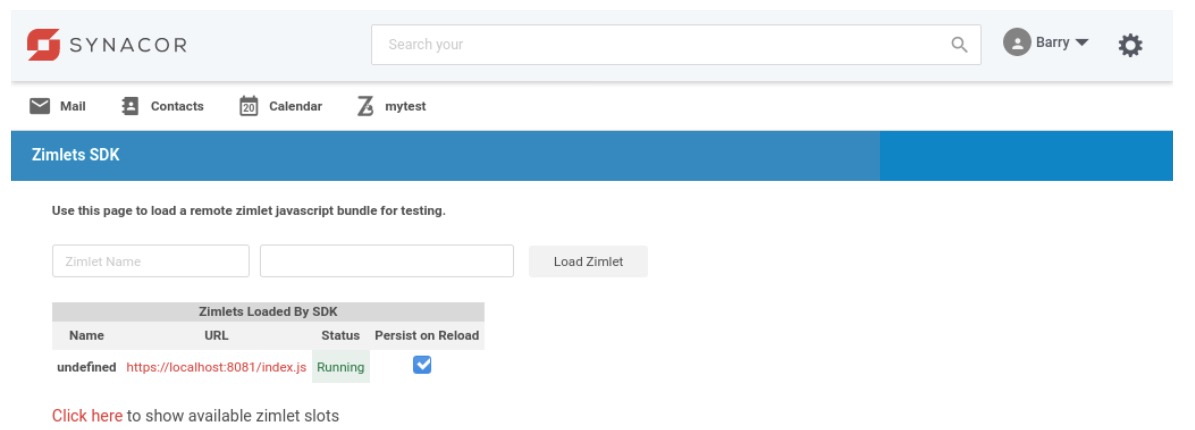
Sideload the Zimbra Attacher Zimlet by clicking Load Zimlet. The Zimlet is now added to the Zimbra UI in real-time. No reload is necessary.
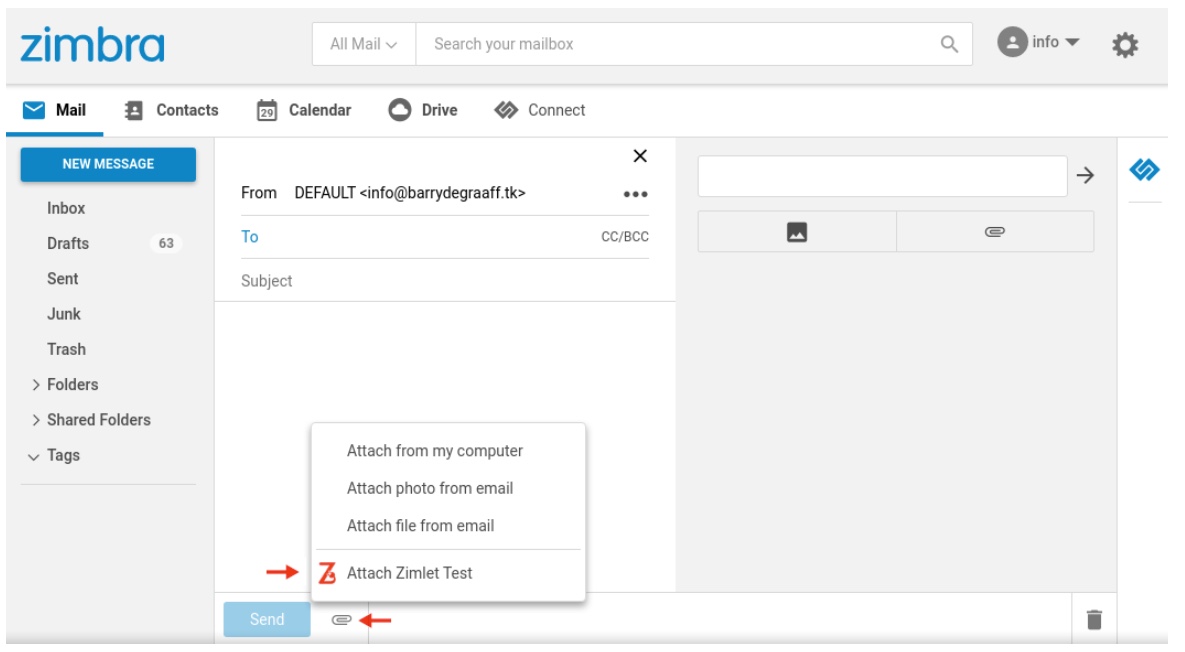
Click the paper clip icon in the Zimbra compose window, then click Attach Zimlet Test to add an attachment.
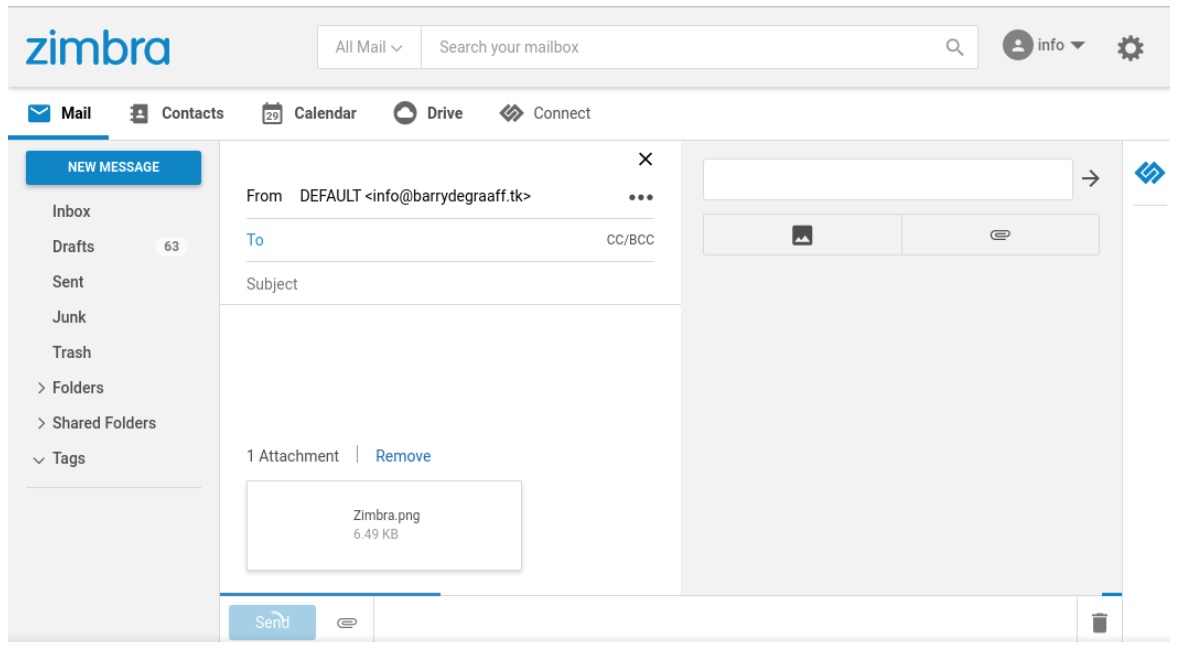
Zimbra.png is added as an example to the email.
Visual Studio Code for the Zimbra Attacher Zimlet
Open the folder ~/zimbra_course_pt4/zimbra-zimlet-attacher in Visual Studio code to take a look at the code in the Attacher Zimlet. More information on this can be found at: https://github.com/Zimbra/zm-zimlet-guide.
Implement the Zimbra Attacher Zimlet
First step is to implement the Zimlet slot compose-attachment-action-menu. This is done in
~/zimbra_course_pt4/zimbra-zimlet-attacher/src/index.js

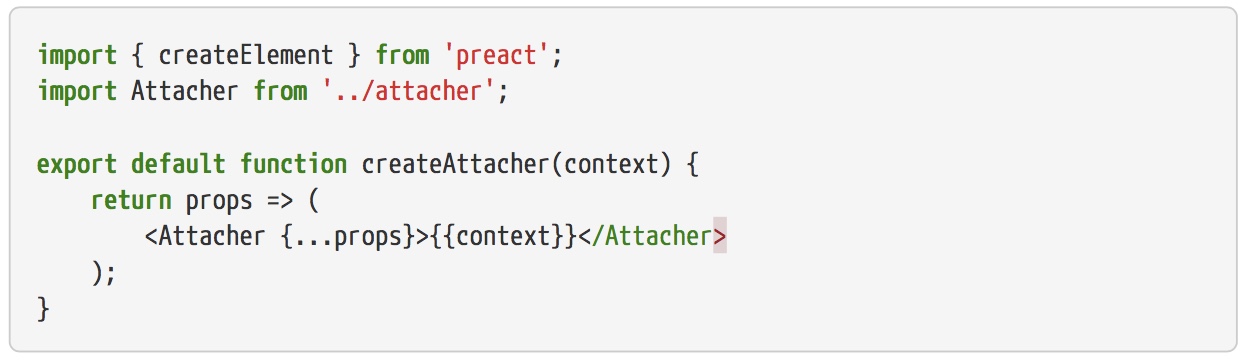
The usual wrapper component is used to pass on the context to a class component:
~/zimbra_course_pt4/zimbra-zimlet-attacher/src/components/create-attacher/index.js
These steps are explained in more detail in https://github.com/Zimbra/zm-zimlet-guide. Now take a look at
~/zimbra_course_pt4/zimbra-zimlet-attacher/src/components/attacher/index.js
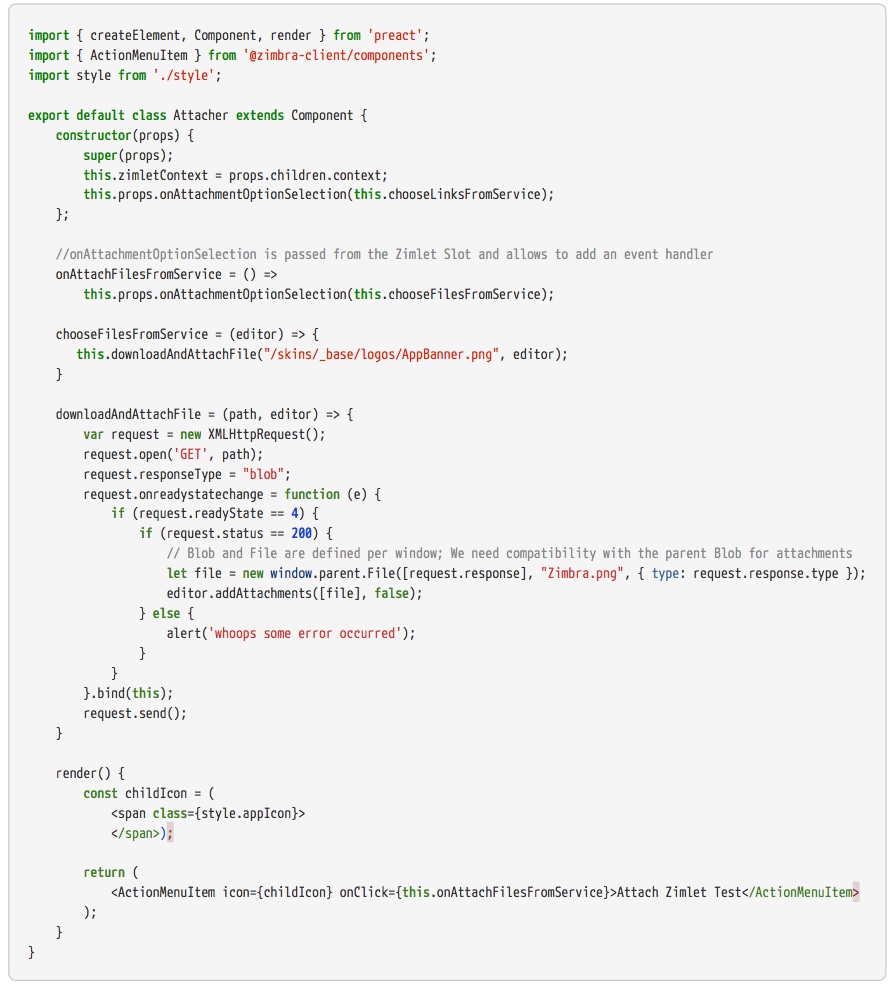
The Attacher component returns an ActionMenuItem that will call onAttachFilesFromService once it is clicked. The ActionMenuItem is what the user sees in the menu in the UI.
It is important to understand that the compose-attachment-action-menu Zimlet slot passes on to our Zimlet the onAttachmentOptionSelection prop. We use this prop to set an event handler for the attaching. This piece of code tells Zimbra to call our method chooseFilesFromService once the menu is clicked.

chooseFilesFromService then receives the editor component that is the Zimbra email composer. You can then use that editor to add attachments to the email. You can add as attachment using:

or attach inline using:

The first is an array filled with attachments in Javascript blob’s. If you only have one attachment to upload, you have to enclose it in an array. The second argument is a boolean. When true, it will ask Zimbra to enforce the maximum file size of the attachment.
Questions or comments? Please leave them below.
Thank you,
Your Zimbra Team
Comments are closed.