In this article you will learn how to set-up Zimbra on JumpCloud. The technology used in this article is SAML, an open standard for Single Sign-On. When using SAML an Identity Provider (IdP) will take care of user authentication after which users can use their applications without having to log-on to each of them separately. In SAML these applications are called Service Providers (SP). JumpCloud is a SAML IdP and Zimbra is a SAML SP.
JumpCloud is a cloud based identity and access management solution. JumpCloud focusses on Two-Factor Authentication (2FA) and integrations with on premise Active Directory, and cloud based SAML IDP’s such as Azure AD, Google Workspace, Okta, Bamboo HR and others. JumpCloud also has integrations with SP’s such as Atlassian Cloud, Salesforce, Slack, Crowdstrike AWS IAM Identity Center and others.
Learning objectives:
- How-to create users in JumpCloud.
- Configuring Zimbra as a SAML SP on JumpCloud.
Setting up JumpCloud
To get started with JumpCloud you will first need to sign up for a free trial. You can do so via: https://jumpcloud.com/get-started once your account is created, this account will be your admin account.
Sign in to JumpCloud using the admin login page at: https://console.jumpcloud.com/login/admin (not this one: https://console.jumpcloud.com/login)
Create users and groups
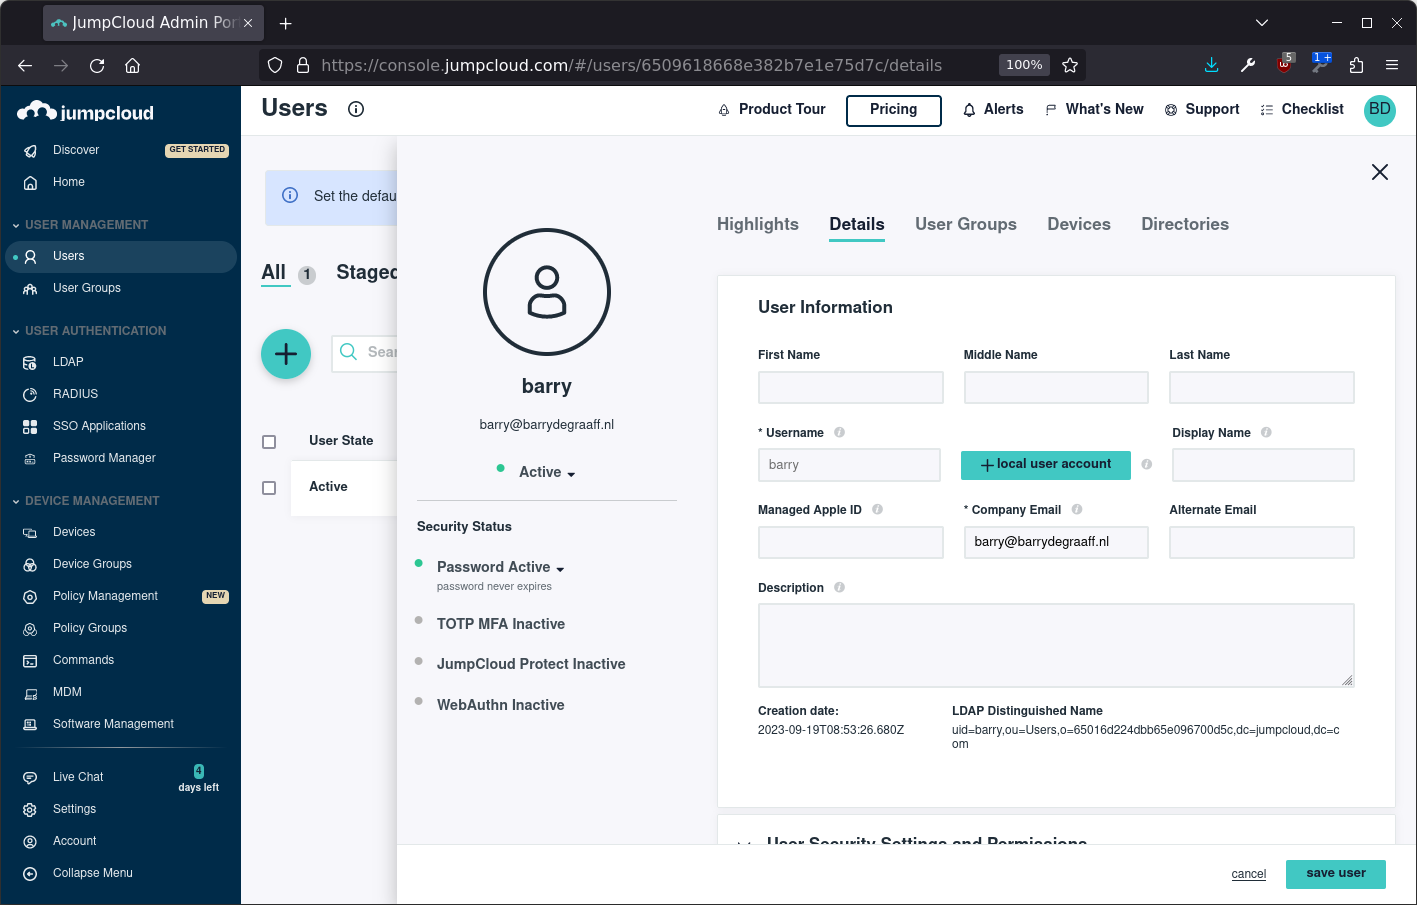
Once signed on, create a user, and set the user password. It is important that the email address for the user matches the email address in Zimbra:
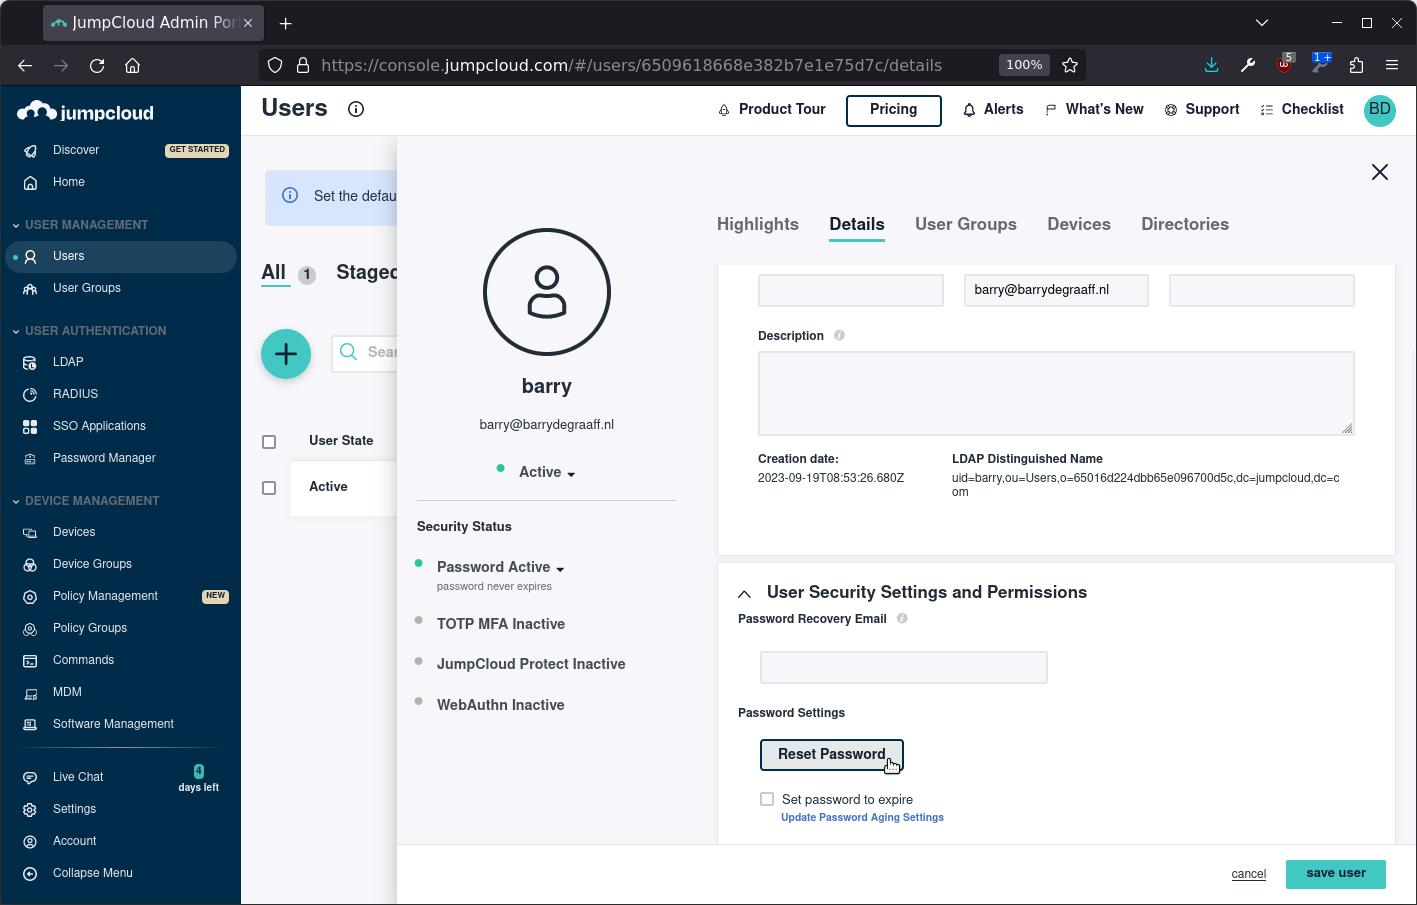
Set the password for the new user under User Security Settings and Permissions:
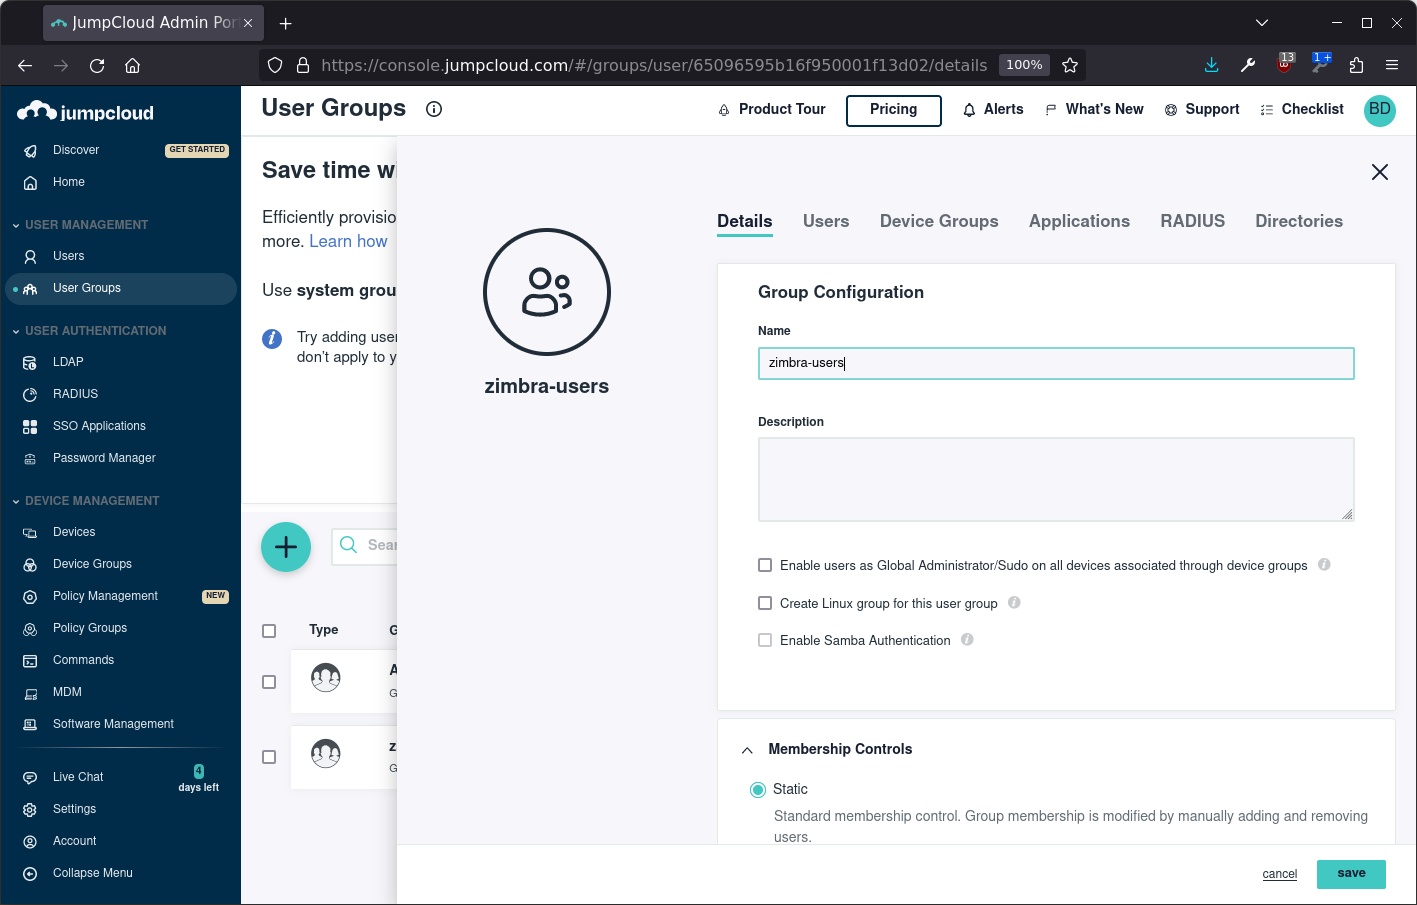
Once the user is created, create a user group using the Static option under Membership Controls:
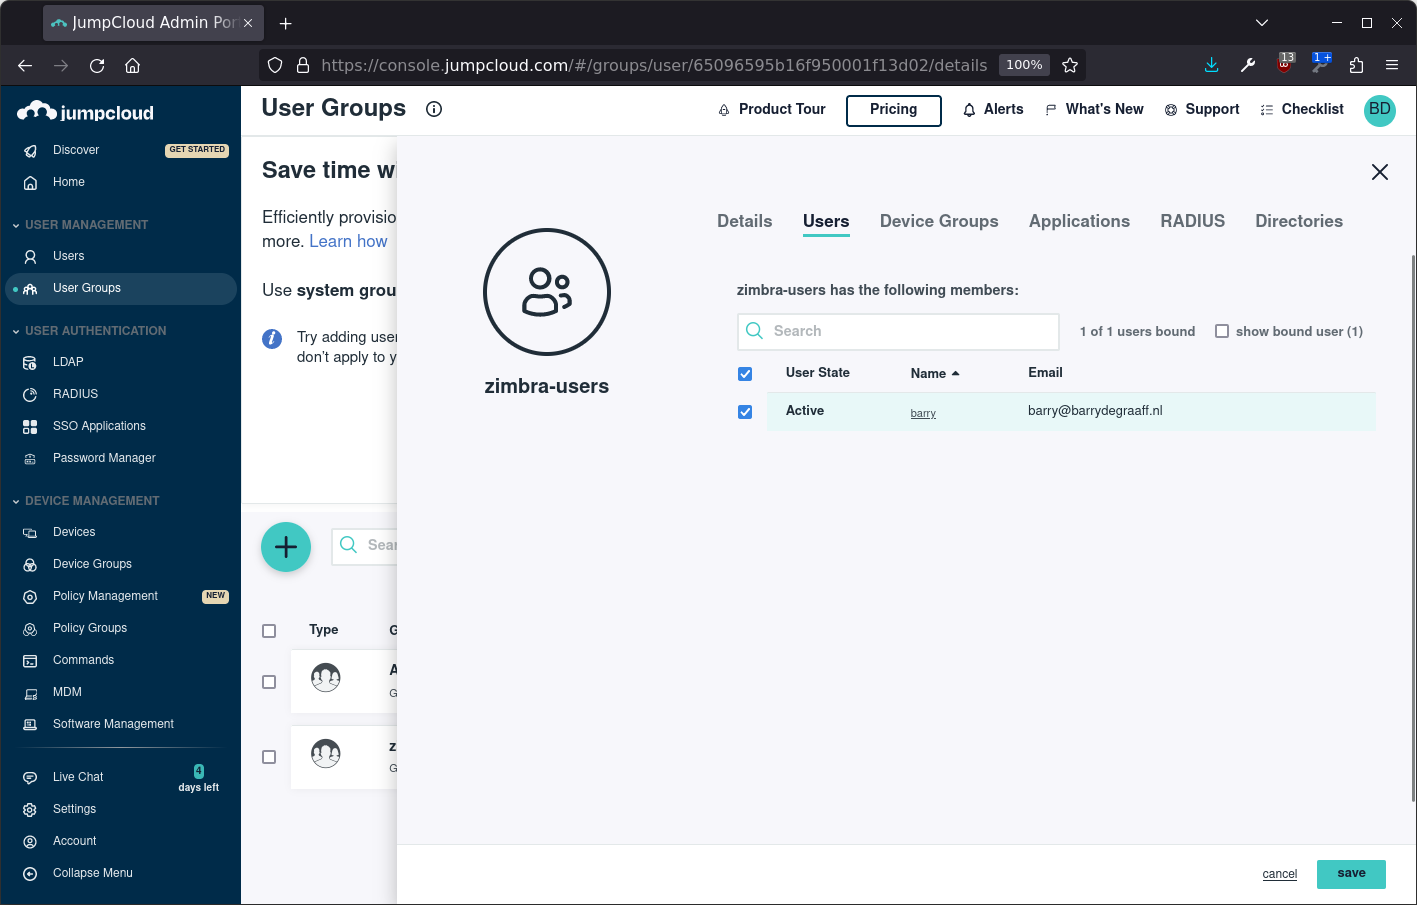
Assign the user to the group:
Create SSO App
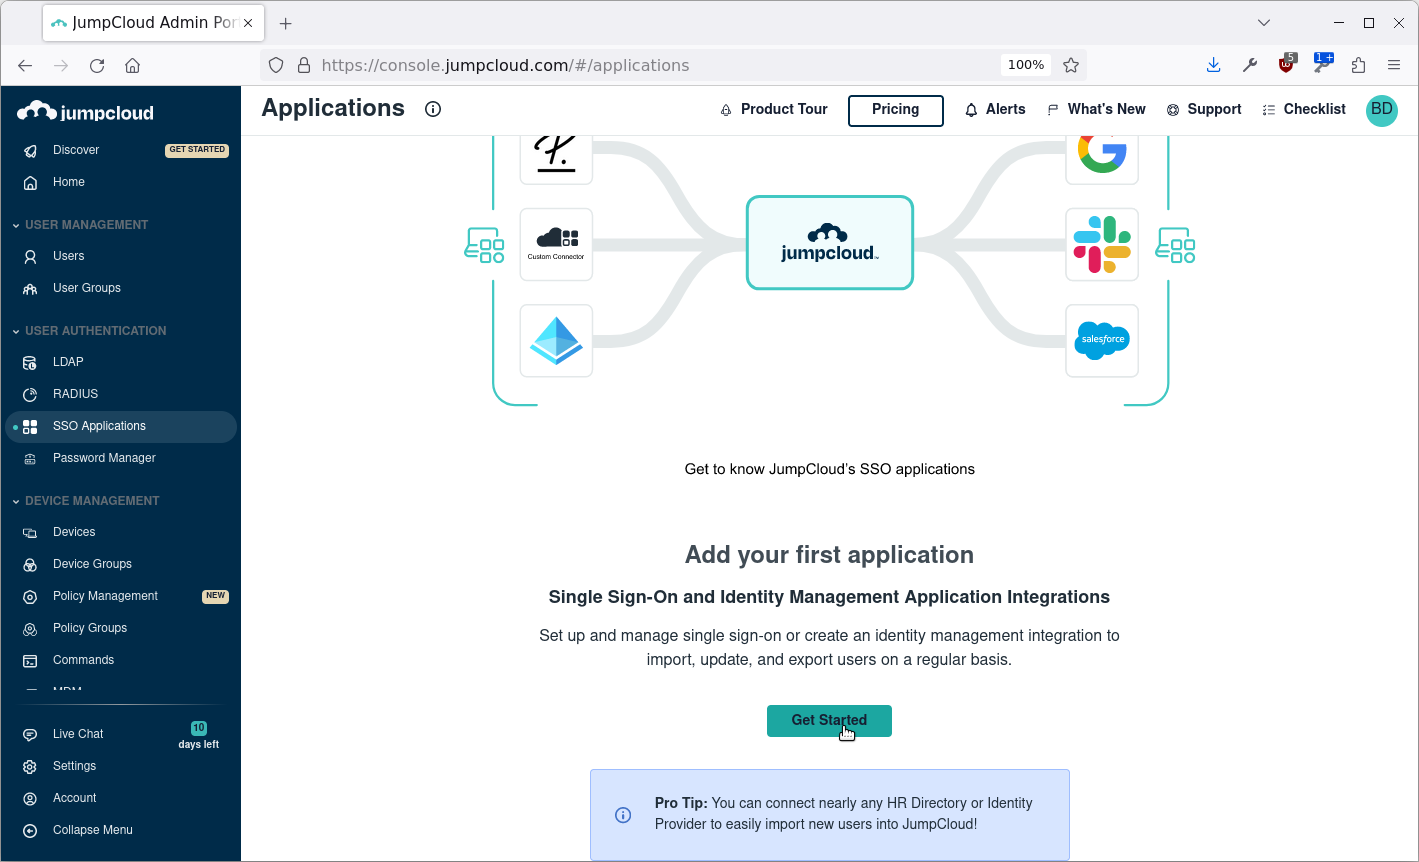
From the left hand menu, select SSO Applications and click Get Started:
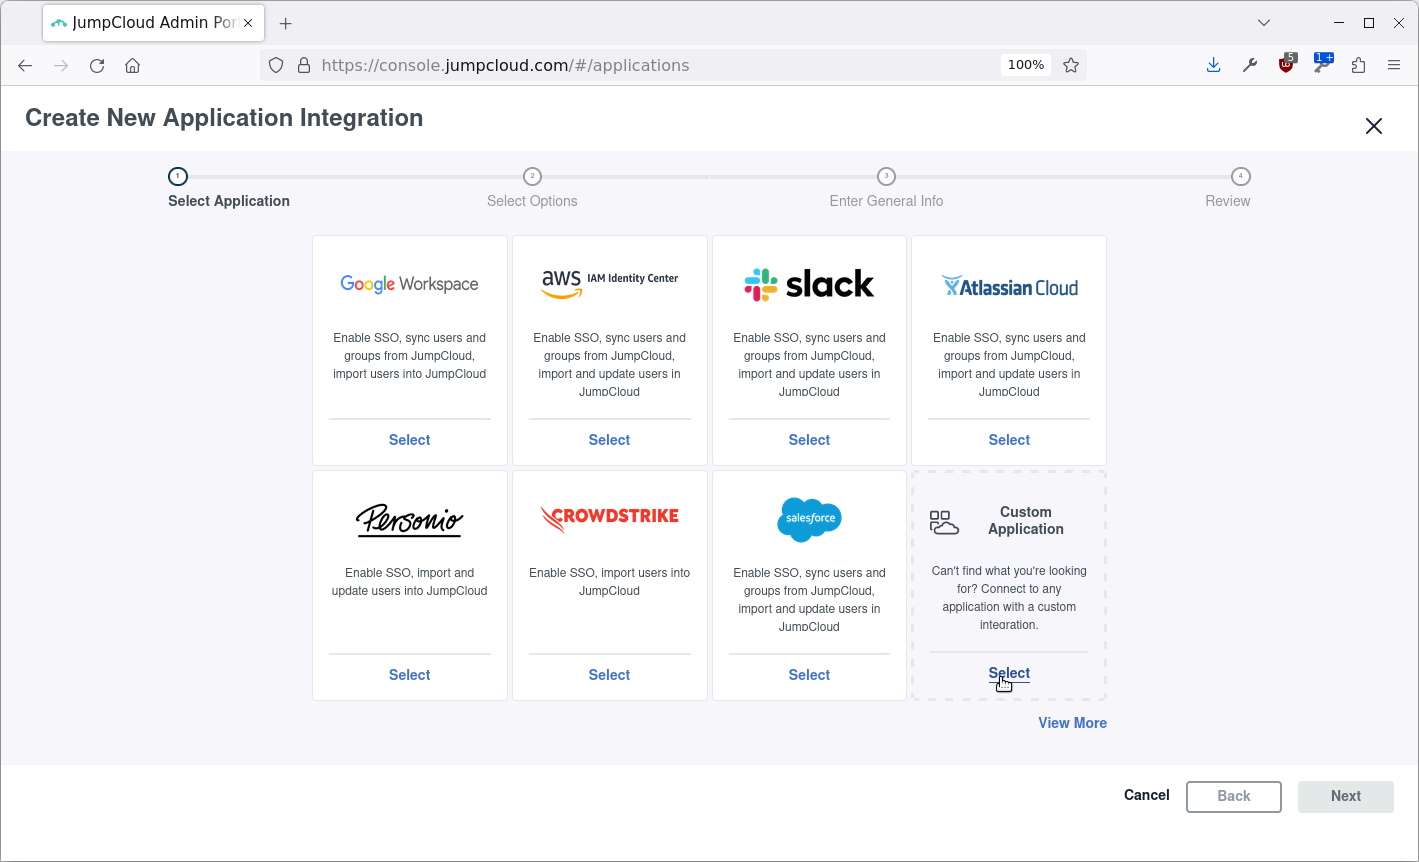
Select Custom Application:
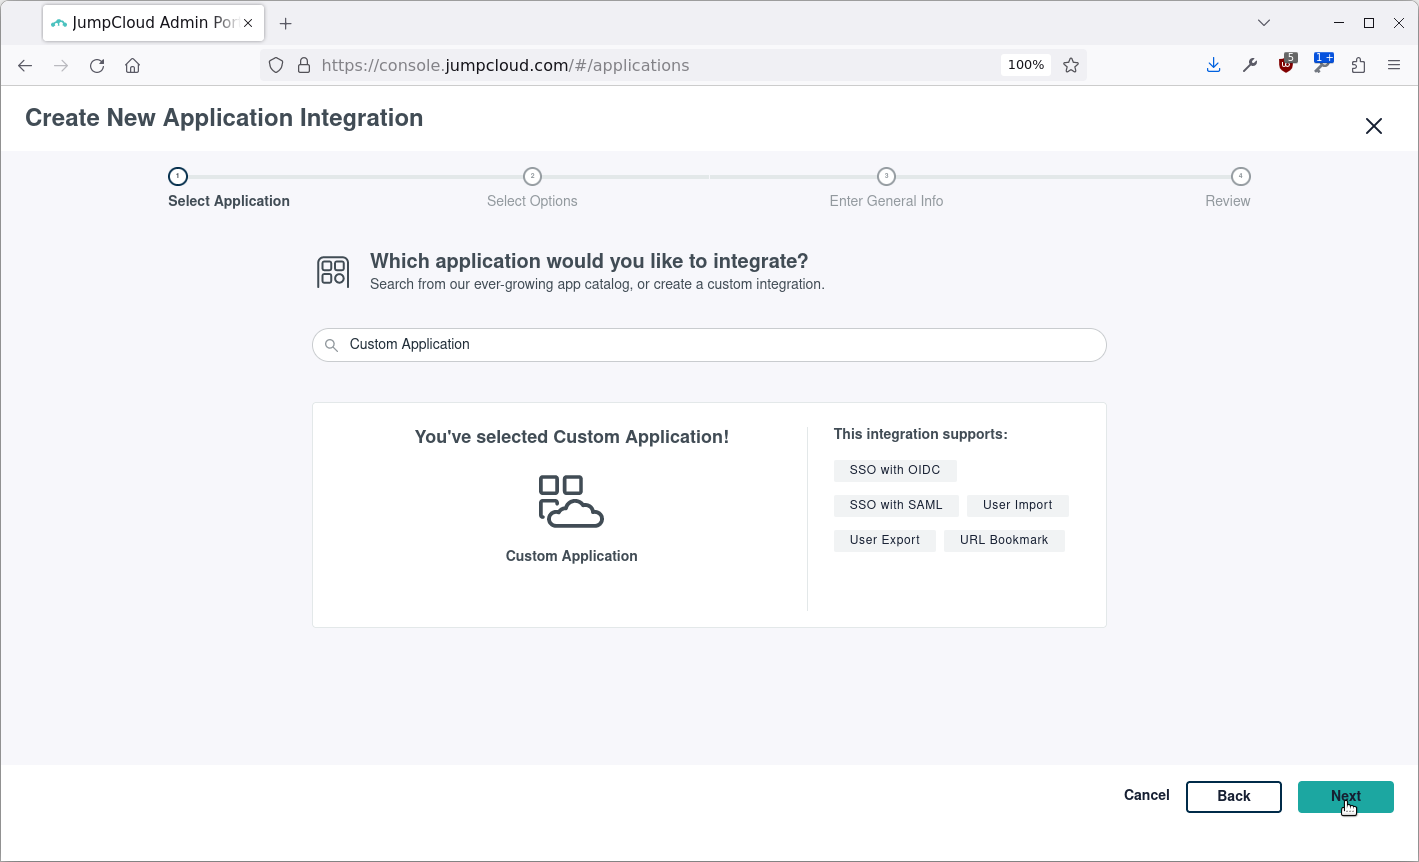
Click Next:
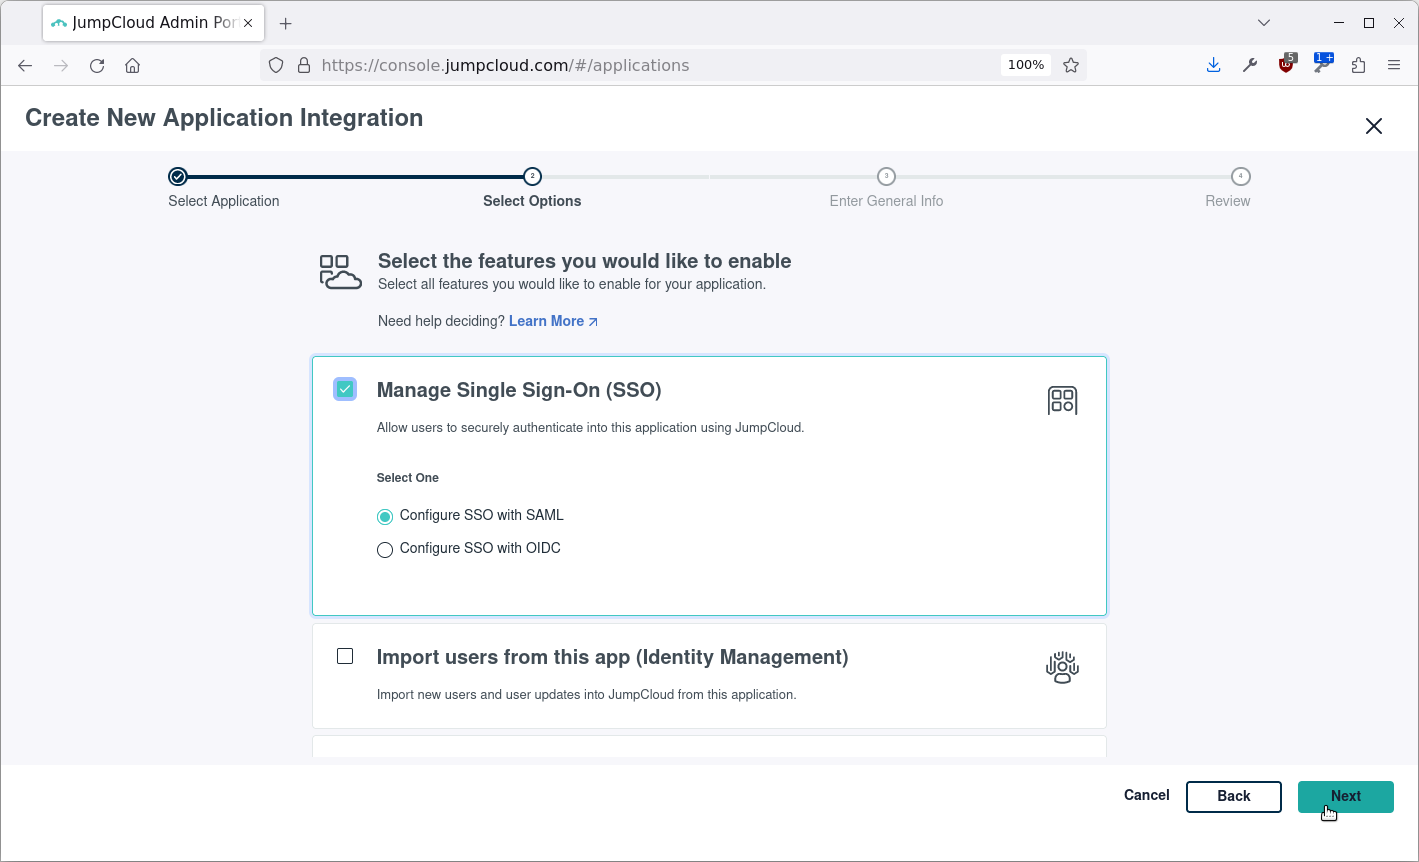
Select Manage Single Sign-On (SSO) and Configure SSO with SAML:
Set a name, color and/or logo for the application and click save. In this example we set the name to zimbra:
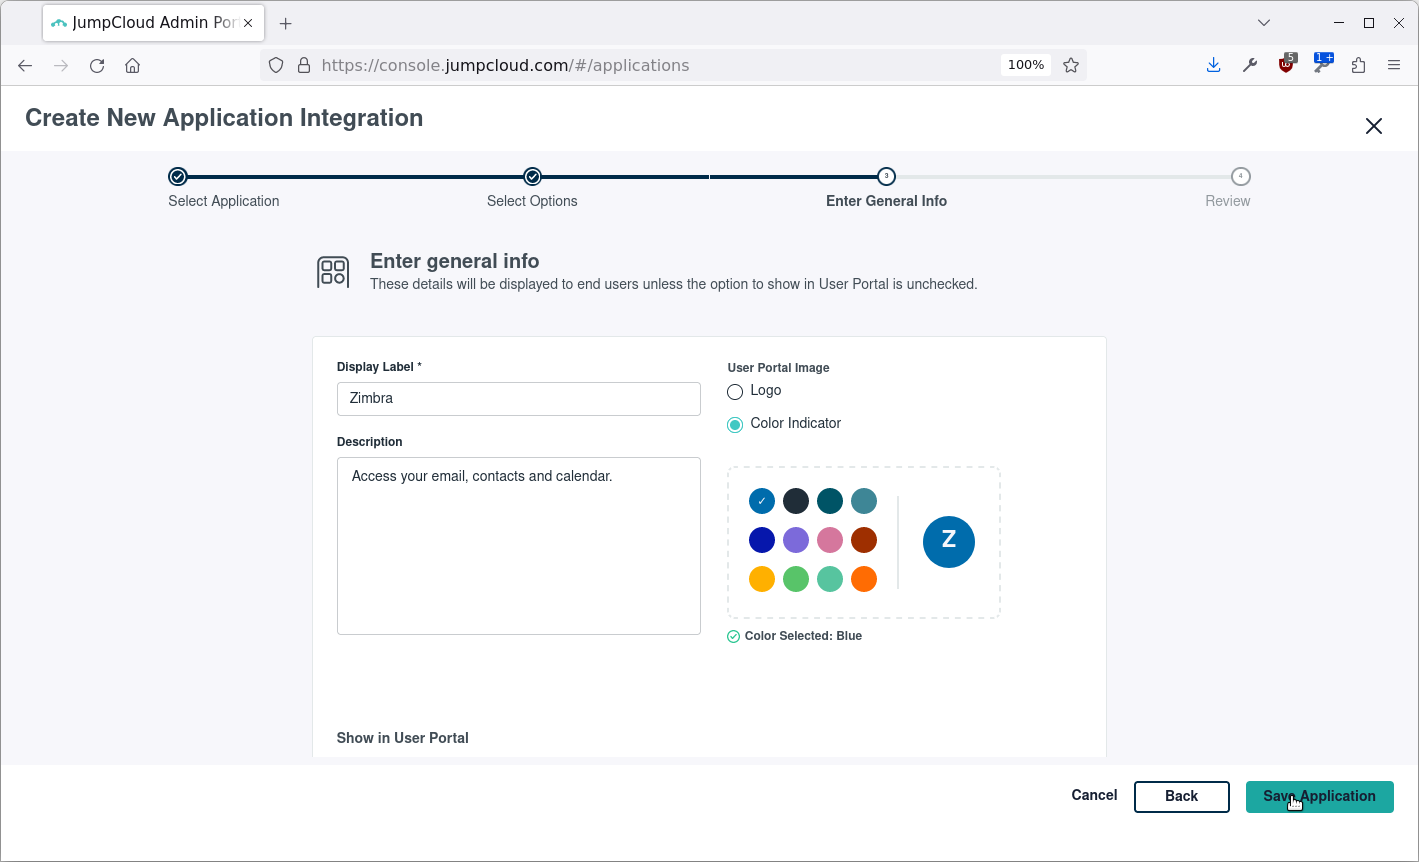
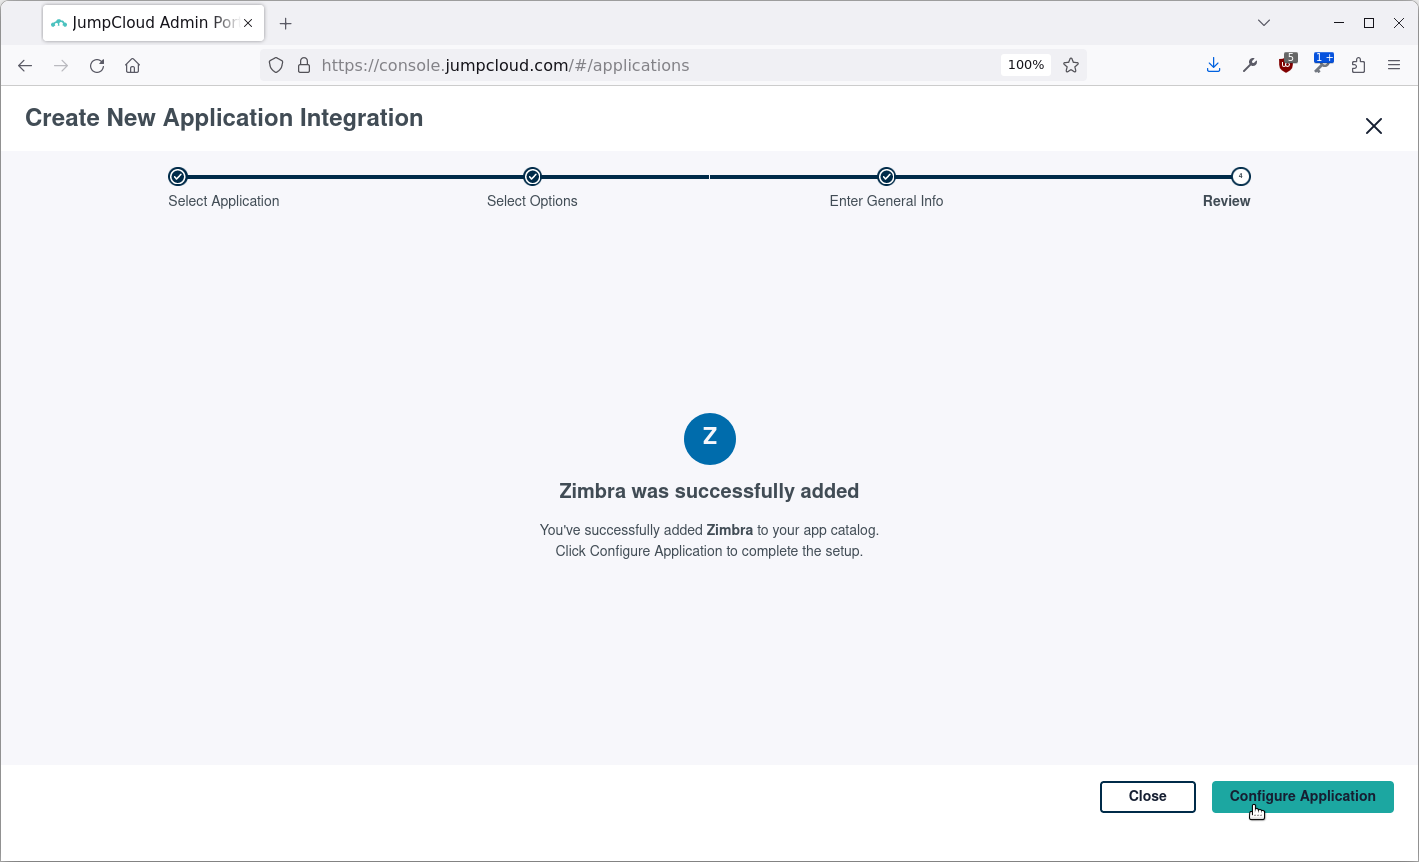
Click Configure Application:
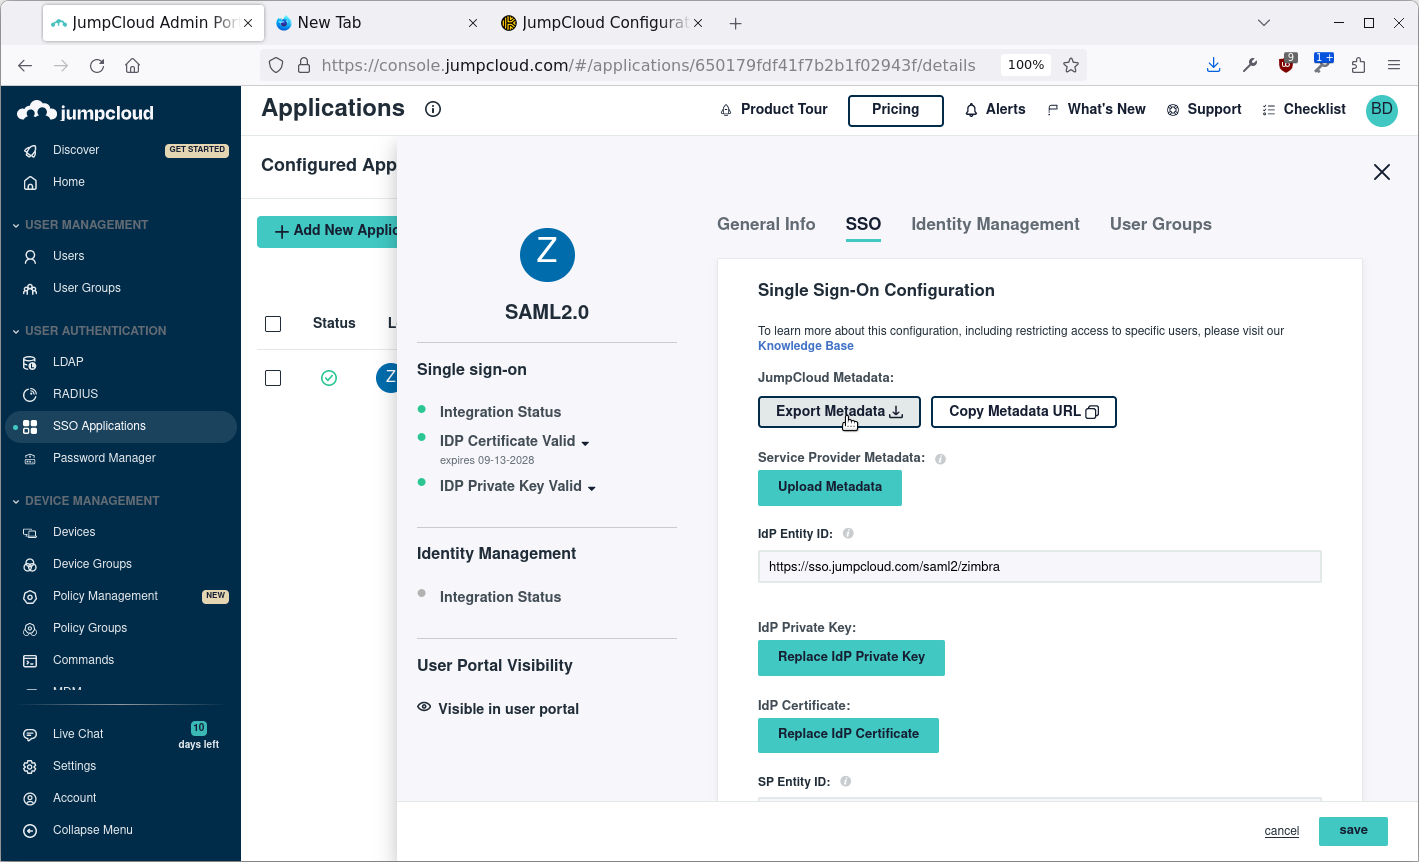
The next steps are not very intuitive, you have to click Export Metadata. This will download an XML file named JumpCloud-saml2-metadata.xml.
Open the file in a text editor or Firefox and find the value in Location:
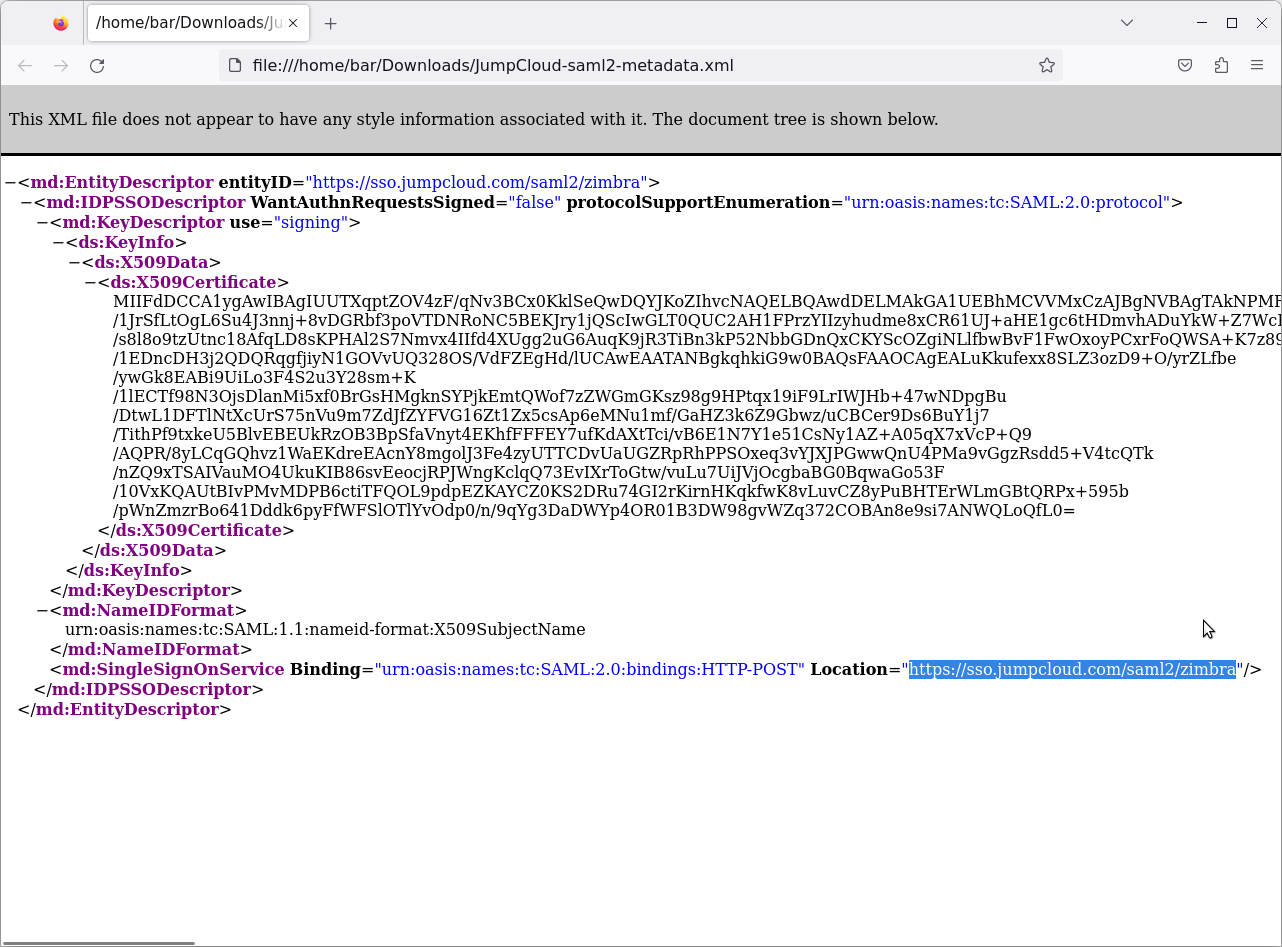
The value
Here is an overview of all the configuration required:
| Field | Value | Remarks |
|---|---|---|
|
IdP Entity ID |
Replace your-app-name-here with the name you chosen. |
|
|
SP Entity ID |
https://your-zimbra-server-domain.com/service/extension/samlreceiver |
Replace your-zimbra-server-domain.com with the domain name of your Zimbra server. |
|
ACS URL |
https://your-zimbra-server-domain.com/service/extension/samlreceiver |
Replace your-zimbra-server-domain.com with the domain name of your Zimbra server. This is configured as the only ACS URL with index 0. |
|
SAMLSubject NameID |
|
|
|
SAMLSubject NameID Format |
urn:oasis:names:tc:SAML:1.1:nameid-format:emailAddress |
|
|
Signature Algorithm |
RSA-SHA256 |
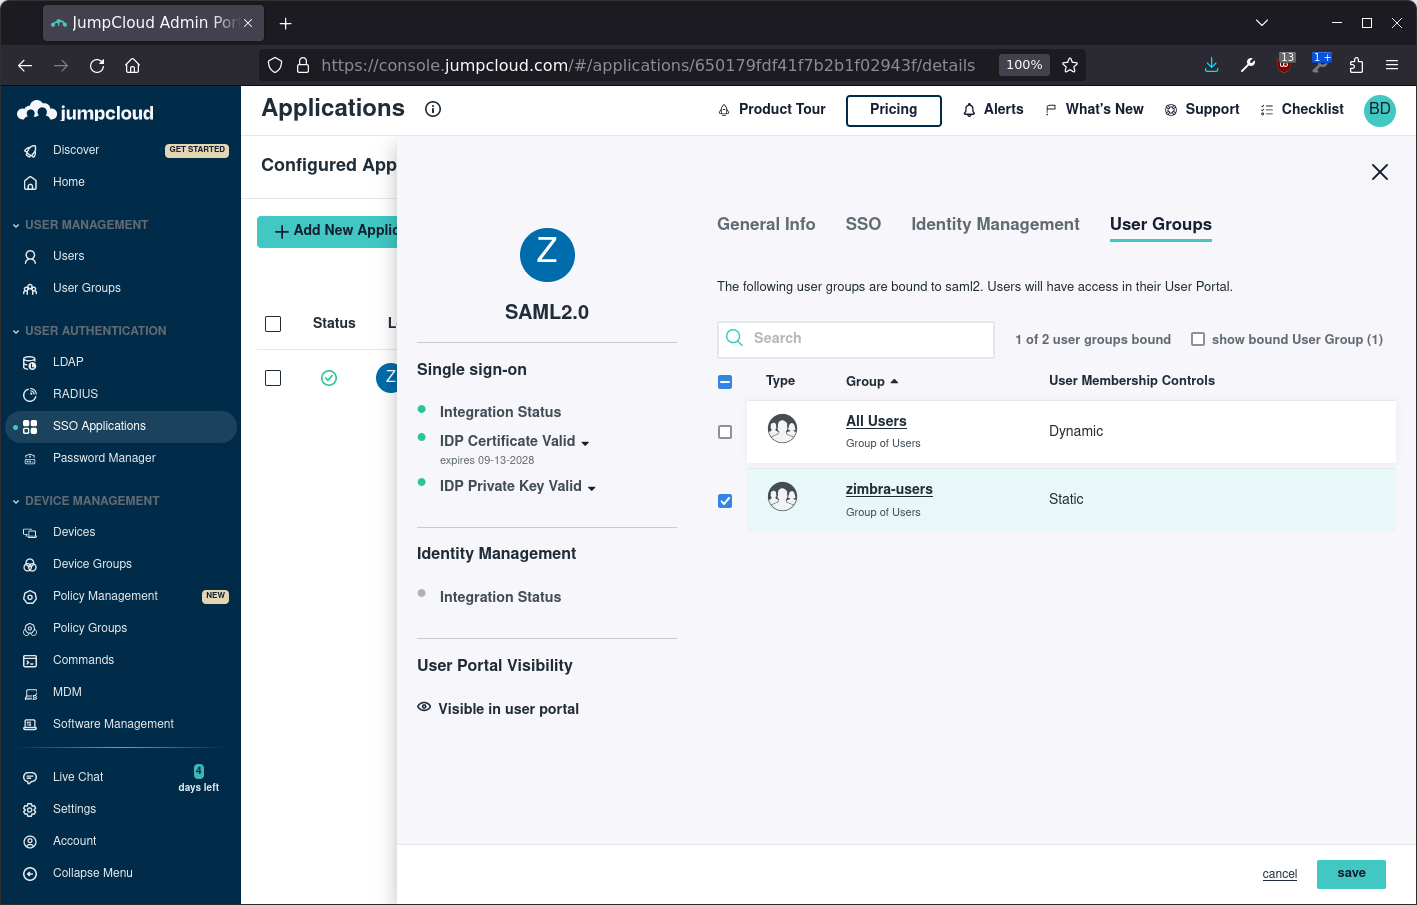
Next step is to configure the user group on the application as follows:
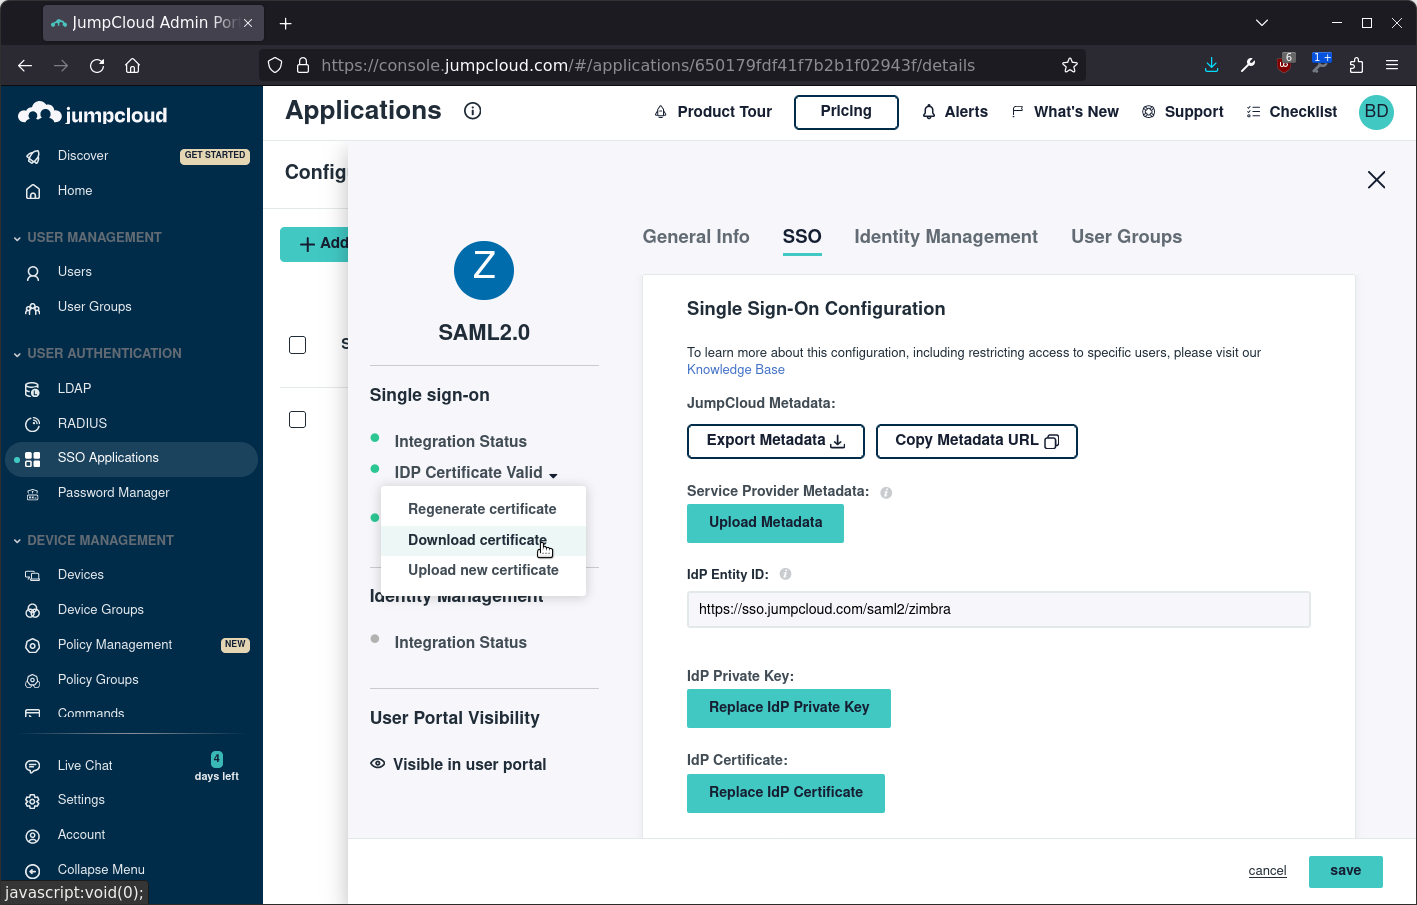
Finally download the IDP certificate, it can be found in the left menu, and copy the file to your Zimbra server as /tmp/idpcert.pem. Save the JumpCloud configuration:
Set up Zimbra
Create the config directory using:
mkdir -p /opt/zimbra/conf/saml
Add the file /opt/zimbra/conf/saml/saml-config.properties to configure SAML in Zimbra add the contents, update the URL’s!:
# Issuer
saml_sp_entity_id=https://your-zimbra-server-domain.com/service/extension/samlreceiver
# Login receiver for the service provider
saml_acs=https://your-zimbra-server-domain.com/service/extension/samlreceiver
# Name ID format for the IDP to use in the SAMLResponse
saml_name_id_format=urn:oasis:names:tc:SAML:1.1:nameid-format:emailAddress
# Date format for issue instant
saml_date_format_instant=yyyy-MM-dd'T'HH:mm:ss'Z'
# Identity provider login endpoint for redirect method  !!UPDATE THIS it is NOT /zimbra!!
saml_redirect_login_destination=https://sso.jumpcloud.com/saml2/zimbra
# Identity provider login endpoint for POST method
saml_post_login_destination=
# Identity provider logout endpoint for redirect method
saml_redirect_logout_destination=
# Identity provider logout endpoint for POST method
saml_post_logout_destination=
# Logout redirect page if we are the landing page logout endpoint
saml_landing_logout_redirect_url=/
# Disable the audience path check
saml_skip_audience_restriction=true
# URL to send the user with error_code, error_msg query params. Default results in HTTP error code pages.
saml_error_redirect_url=
# The SAML logout document encoding, and SAML login receiver parameter encoding.
saml_document_encoding=ASCII
# Set to true to disable the audience path check.
saml_skip_audience_restriction=false
# The redirect location to send the user if their Zimbra account is not active.
saml_inactive_account_redirect_url```
From the command line as user root copy the samlextn.jar and set up the IDP certificate like this:
mkdir /opt/zimbra/lib/ext/saml
cp /opt/zimbra/extensions-network-extra/saml/samlextn.jar /opt/zimbra/lib/ext/saml/
su zimbra
cat /tmp/idpcert.pem |xargs -0 zmprov md example.com zimbraMyoneloginSamlSigningCert
#only do this if you are having trouble
# zmprov mcf zimbraCsrfRefererCheckEnabled FALSE
zmprov mcf zimbraCsrfAllowedRefererHosts sso.jumpcloud.com
# new since 9.0.0 patch 25 you are required to set zimbraVirtualHostName:
zmprov md example.com zimbraVirtualHostName zimbra.example.com
#JumpCloud is under a different domain, disable the SameSite cookie setting
/opt/zimbra/bin/zmlocalconfig -e zimbra_same_site_cookie=""
zmmailboxdctl restart
Configurable Properties saml-config.properties
The samlextn.jar uses a property file located at: ${zimbra_home}/conf/saml/saml-config.properties.
The following properties are supported:
| Key | Description | Default | Optional |
|---|---|---|---|
|
saml_sp_entity_id |
Issuer |
||
|
saml_acs |
Login receiver for the service provider |
||
|
saml_redirect_login_destination |
Identity provider login endpoint for redirect method |
||
|
saml_redirect_logout_destination |
Identity provider logout endpoint for redirect method |
||
|
saml_post_login_destination |
Identity provider login endpoint for POST method (unused) |
√ |
|
|
saml_post_logout_destination |
Identity provider logout endpoint for POST method (unused) |
√ |
|
|
saml_name_id_format |
Name ID format for the IDP to use in the SAMLResponse |
|
√ |
|
saml_date_format_instant |
Date format for issue instant |
|
√ |
|
saml_error_redirect_url |
URL to send the user with |
√ |
|
|
saml_landing_logout_redirect_url |
Logout redirect landing page if we are the last logout service. |
|
√ |
|
saml_document_encoding |
The SAML logout document encoding, and SAML login receiver parameter encoding. |
|
√ |
|
saml_skip_audience_restriction |
Set to true to disable the audience path check. |
|
√ |
|
saml_inactive_account_redirect_url |
The redirect location to send the user if their Zimbra account is not active. |
|
√ |
Try logging in
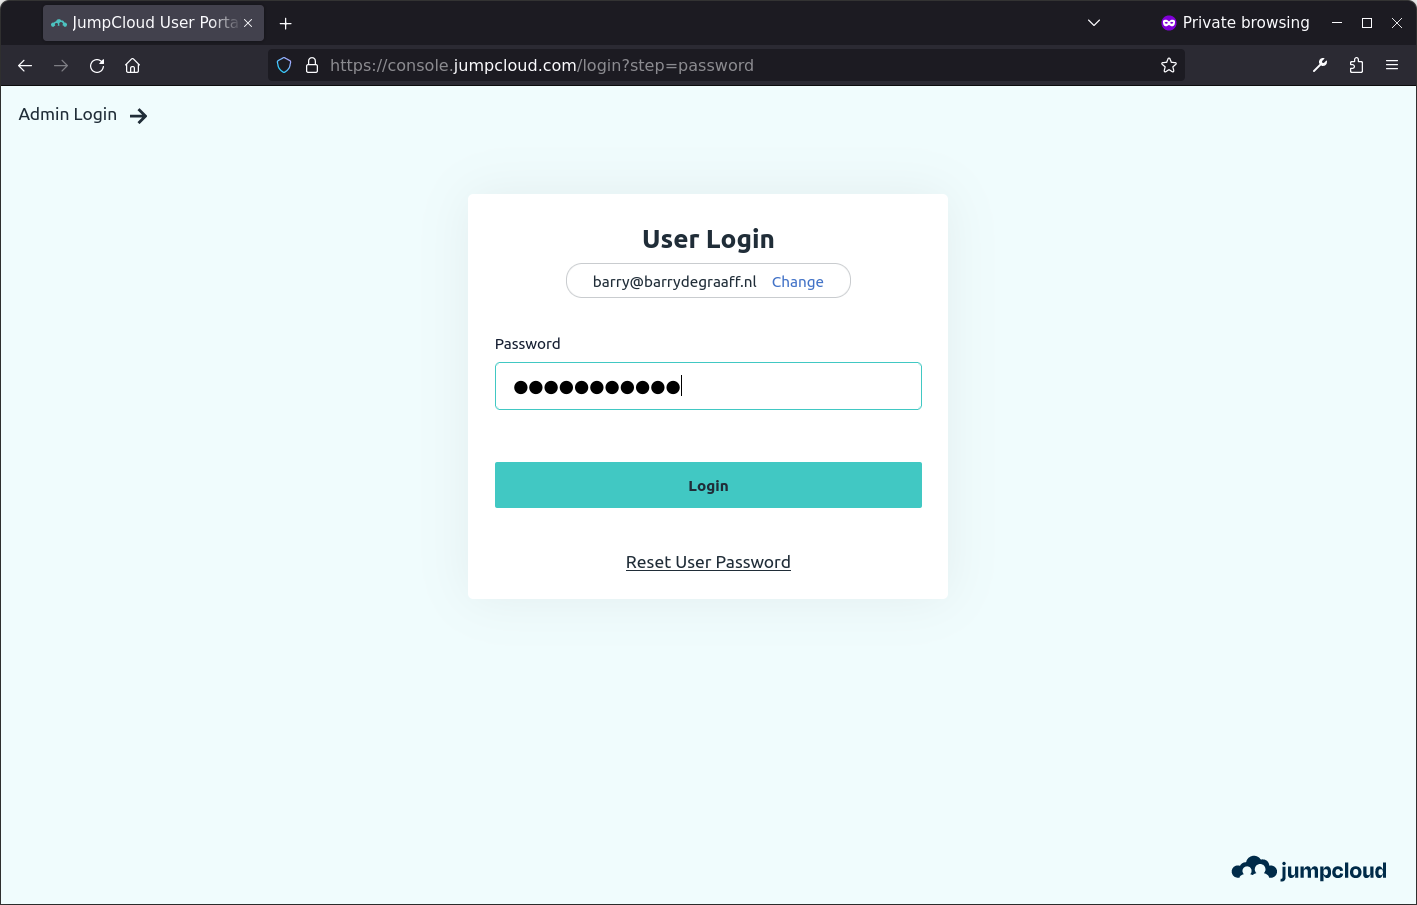
Now you are ready to log-on to Zimbra using SAML. Try a fresh browser/incognito window and go to: https://console.jumpcloud.com/login and log in the the user you created. If the sign-on works you will see the user dashboard:
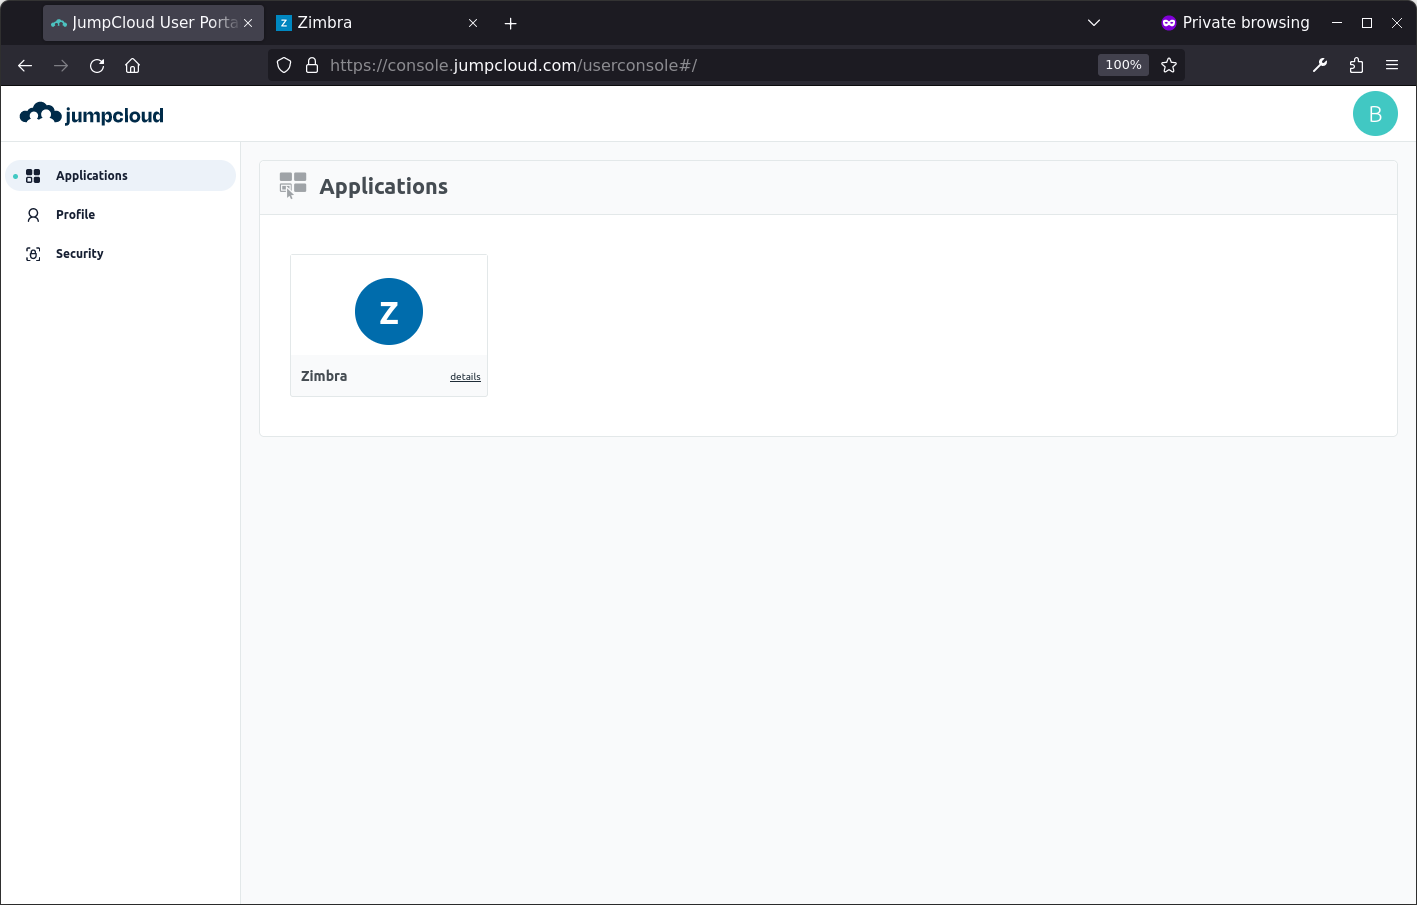
Click the Zimbra tile, and if all goes will, you should be signed on to Zimbra:
You can change the default log-in page for Zimbra using
zmprov md example.com zimbraWebClientLoginURL https://console.jumpcloud.com/login

Comments are closed.